How to Generate e way bill in Tally Prime
e-Way Bill in TallyPrime
The e-Way Bill system was introduced by the government to simplify and streamline the process of GST compliance. An e-Way Bill document has to be carried while shipping the goods from one location to another. This document will carry the e-Way Bill number and other relevant details. Accordingly, TallyPrime is here with a smooth e-Way Bill experience for you and your business. The best part is that Tally’s e-Way Bill solution is based on regular invoicing activity, and does not require any special expertise.
As a registered dealer, if you are shipping material worth more than Rs 50,000, then you have to generate an e-Way Bill from the portal by entering necessary information such as the details of the buyer, the quantity and HSN code of the goods, transporter ID, and so on. After you upload these details, an e-Way Bill number will be generated for this particular transaction. You have to print the e-Way Bill number and other details along with the invoice, and furnish them on the way, if needed. For example, an assessing officer might inspect the shipment, and might cross-check the e-Way Bill information with the goods being transported.
TallyPrime’s e-Way Bill solution is simple and is based on regular invoicing activity. For example, if you use TallyPrime, then you only have to record your sales transactions as usual, and your e-Way Bill requirement will be covered in the same flow. Important details will be updated in the vouchers automatically, and you can proceed to print them. Moreover, TallyPrime will ensure that both your business accounts and compliance requirements are suitably addressed.
TallyPrime also provides you with the flexibility to generate e-Way Bill in bulk for multiple invoices. If you do not want to generate the e-Way Bill while recording the transaction, then you can select one or more transactions from the Exchange menu and generate the e-Way Bill at your convenience. Moreover, TallyPrime also provides you with an option to cancel the e-Way Bill or update details such as Bill Part B and Transporter ID.
We understand how valuable your data is for you and your business, and we have provided various measures in TallyPrime to safeguard your data. All the requests for online e-Way Bill generation will pass through Tally GSP (TIPL), which has been awarded ISO 27001:2013 certificate for its stringent security policies. The best part is that you will not need any additional software or plugins to enjoy the benefits of e-Way Bill in TallyPrime.
One-Time Simple Setup
Getting started with e-Way Bill is easy! You only have to create your e-Way Bill profile on the portal and enable e-Way Bill in TallyPrime.
Create e-Way Bill Profile on the Portal
To get started with e-Way Bill, you have to first register your business on the e-Way Bill portal, and then create an API user profile by selecting Tally India Pvt Ltd as your GSP.
Register on e-Way Bill portal
- Open the e-Way Bill portal, and click Registration > e-Way Bill Registration.
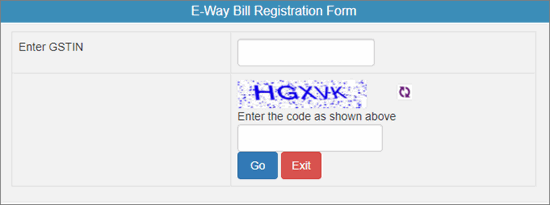
- Enter the GSTIN of your business in the following e-Way Bill Registration Form, followed by the CAPTCHA code, and click Go.
The business details will appear as per the GSTIN entered.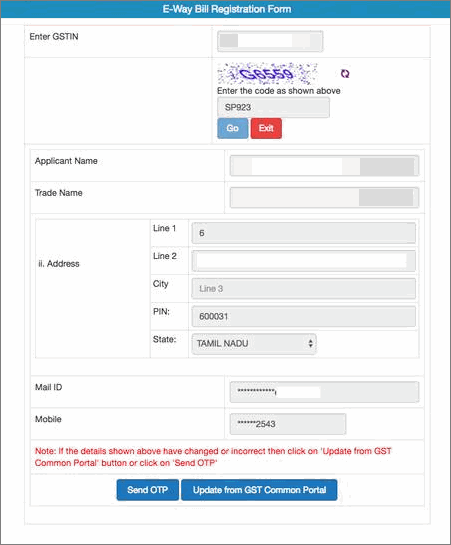
- Click Send OTP to verify the details.
Note: If you want to update any details, then click Update from GST Common Portal. The latest data will be fetched from the GST portal.
- Enter the code received on your registered mobile number, and click Verify OTP.
After verifying the OTP, you will have to enter a username and password to create your login credentials.
Create API User Profile
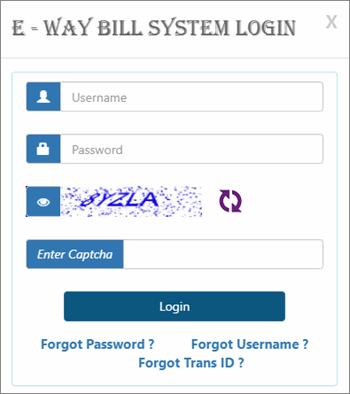
- Open the e-Way Bill portal, and click Login.
- Log in with the username and password created earlier.
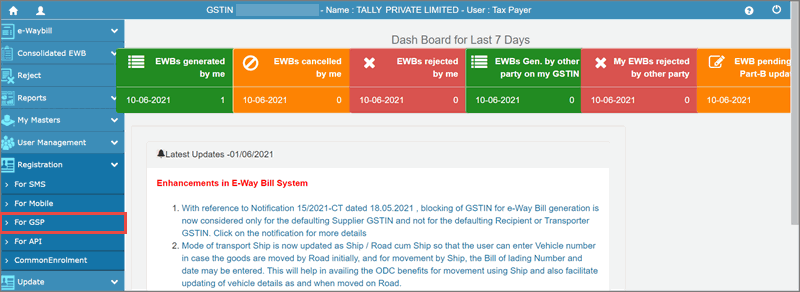
- Click Registration > For GSP.
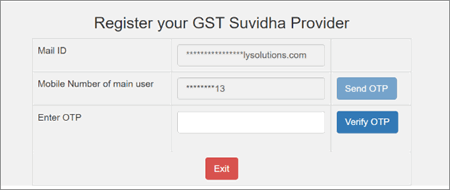
The following screen appears, where the e-mail ID and mobile number will be prefilled. - Click Send OTP. An OTP will be sent to the registered mobile number.
- Enter the OTP and click Verify OTP.
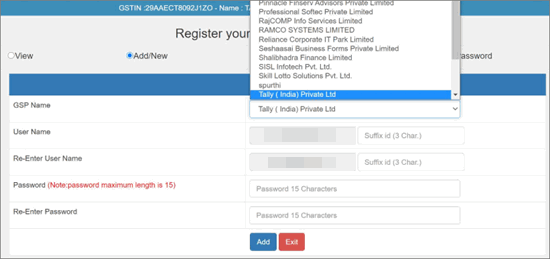
Once the OTP is verified, the following screen appears, where you can add your preferred GSP. - Select Add/New. The following screen appears.
- Select Tally (India) Private Limited IPL under GSP Name.
- Enter your preferred username and password, and click Add to save the details.
Note: The API user credential is different from your e-Way Bill credential.
A user profile will be created with Tally (India) Private Ltd as the GSP. You have to use these API credentials in TallyPrime to log in to the e-Way Bill portal and perform online e-Way Bill-related activities from TallyPrime.
Enable e-Way Bill in TallyPrime
To enjoy the benefits of e-Way Bill in TallyPrime, you have to enable the e-Way Bill facility in your company features.
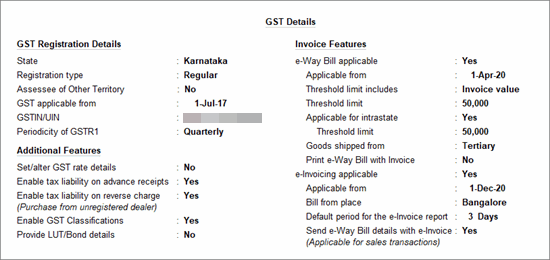
- Press F11 and set Enable Goods and Services (GST) to Yes. The GST Details screen opens.
- Set the option e-Way Bill applicable to Yes. You will find options to set the date of applicability, threshold limit, and so on. You also have the option to generate e-Way Bill details along with the e-invoice, if required.
- Set the required details and accept the screen. As always, you can press Ctrl+A to save the details.
Online e-Way Bill
TallyPrime provides you with an online e-Way Bill solution that fits right into your regular invoicing process. e-Way Bill in TallyPrime isn’t restricted to only a particular voucher type. Apart from regular sales invoice, TallyPrime also supports e-Way Bill for POS, debit notes, and credit notes. What’s more, even receipts and journal vouchers are supported for e-Way Bill when they are used for sales.
No matter how you record your supplies in TallyPrime, you can easily generate the e-Way Bill number while saving your invoice and print the QR code and other details. Later, if you want to update the details of your transaction, then you can easily cancel the current e-Way Bill number and get a fresh one for your updated invoice. This will ensure that the details in your e-Way Bill are up-to-date.
TallyPrime also provides you with the flexibility to generate multiple e-Way Bills at the same time. If you do not want to generate the e-Way Bill while recording the transaction, then you can do it later from the e-Way Bill report. You can select one or more transactions from the sections in the report and generate the e-Way Bill.
Moreover, you also have the choice of generating the e-Way Bill along with your e-invoice, or even generate the e-invoice without the e-Way Bill, if required.
Prerequisites
Before proceeding with online e-Way Bill generation, ensure that:
- You are connected to the internet.
- You are logged in with your e-Way Bill credentials.
- You have enabled e-Way Bill in TallyPrime.
In this section
- Generate e-Way Bill
- Generate e-Way Bill in Bulk
Generate e-Way Bill
You can easily generate an e-Way Bill while saving your invoice and also print the QR code and other details. If you want to generate your e-Way Bill details along with your e-invoice, then set the option Send e-Way Bill details with e-Invoice to Yes in your company (F11) features.
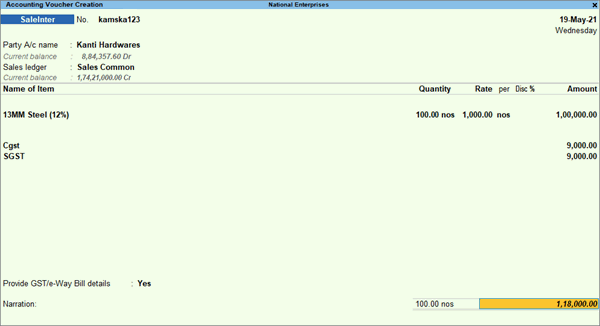
Record a GST Sales transaction, as usual.
Under Party A/c name, select the party. The Dispatch Details screen will appear.
Enter the required details and press Enter.
The Party Details screen will appear. This will be prefilled as per the information provided in the party ledger.Update the Party Details, if required, and press Enter to proceed to the transaction.
- Specify other voucher details, such as the Sales ledger, Name of Item, GST ledger, and so on.
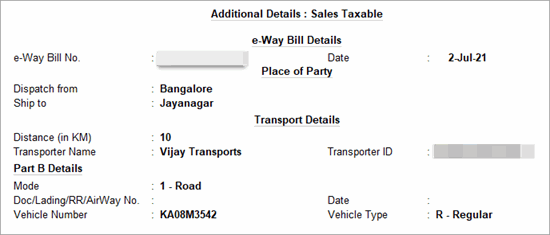
- Set the option Provide GST/e-Way Bill details to Yes. The Additional Details: Sales Taxable screen will appear. The e-Way Bill will be generated based on the details entered in this screen.
- Dispatch from and Ship to: This will be prefilled based on the address provided in the Company and Party ledger, respectively. You can update this, if required.
- Distance (in Km): This is the distance between the addresses of the Consignor and Consignee. The validity of your e-Way Bill depends on the distance entered in this field. The next time you record a transaction for this party, the distance will be prefilled based on the address and PIN code entered in the Party ledger.
- Transporter Name: Select the Transporter Name. You can set it as None if you are transporting the goods using your own or hired vehicle, or if you are using a different mode of transport such as Rail, Air, or Ship.
- Transporter ID: Enter the Transporter ID provided by the transporter.
If Part B Details are available, then you can enter the following details. - Mode: Select the mode of transport, such as Road, Rail, Air, or Ship. You can also create a New Mode, if required.
- Vehicle Number: Specify the number of the vehicle used for transporting the goods.
- Vehicle Type: Specify the size of the vehicle, such as Regular, Over Dimensional Cargo, and so on. You can also create a New Vehicle Type, if required.
Press Enter to proceed to the transaction.
Press Ctrl+A to save.
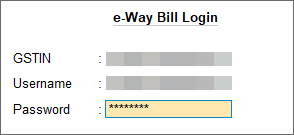
A confirmation screen for e-Way Bill generation will appear.Press Enter to proceed. The e-Way Bill Login screen will appear.
Enter your Username and Password.
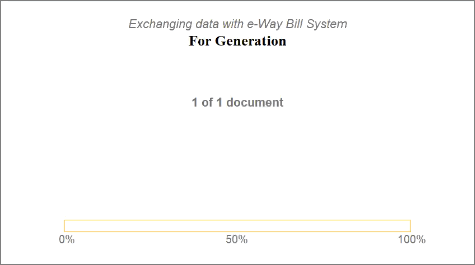
You will remain logged in for the next six hours, provided you do not turn off the computer or reset your credentials.Press Enter. TallyPrime will start exchanging information with the e-Way Bill system.
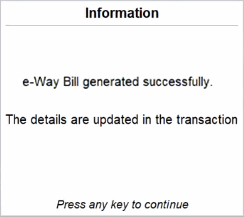
After the exchange of information, a confirmation message will appear.
You can see a preview of the invoice.Press Page Down to view the generated e-Way Bill with all the relevant details and QR Code.
The e-Way Bill No. and Validity Date will also get updated in the Additional Details screen. If you want to explore additional options for configuring your e-Way Bill, then you can press Ctrl+I (More Details) or F12 (Configure).
Generate e-Way Bill in Bulk
If you do not want to generate the e-Way Bill while recording the transaction, then you can do it later from the Exchange menu. You can select one or more transactions and generate the respective e-Way Bill number for your vouchers. Ensure that you have disabled the option Send e-Way Bill details after saving the voucher in the F12 configuration of the voucher.
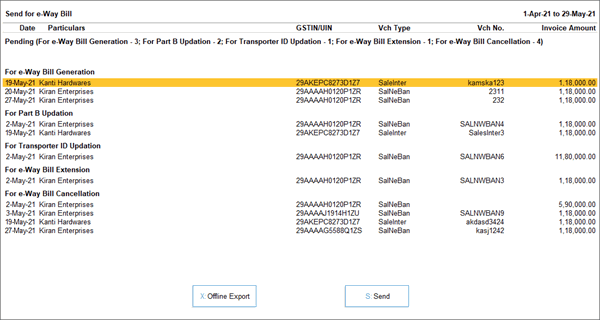
- Press Alt+Z > Send for e-Way Bill. The Send for e-Way Bill screen appears. You can view the transactions that are pending for generation and cancellation.
- Select the required transactions and press S (Send) to send the details. If you press S without selecting any transaction, then all the transactions will be sent.
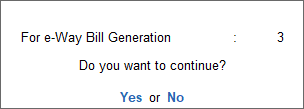
The following confirmation screen will appear, with the number of transactions lined up for e-Way Bill generation. - Press Enter to continue.
- Specify the e-Way Bill Login details and press Enter to continue.
TallyPrime will start exchanging information with the e-Way Bill system. After the exchange of information, a confirmation message will appear.
You will get an idea of how many e-Way Bills were generated or rejected by the portal, or if any transactions could not be uploaded due to technical difficulties.
For more details, you can go the e-Way Bill Report. You can drill down to the transactions under the relevant sections, and update them as needed. Then you can then resend the transactions for e-Way Bill generation.
Related Articles
Prerequisites for e-Way Bill Generation
Prerequisites for e-Way Bill Generation There are some prerequisites for generating an eway bill (for any method of generation): Registration on the EWB Portal The Invoice/ Bill/ Challan related to the consignment of goods must be in hand. If ...How to Generate e way bill for multiple invoices?
How to Generate E-Way Bill for Multiple Invoices Consolidated E-Way Bill (EWB-02) is a single document that contains details of all the E-Way Bills related to the consignments. If you are a transporter/ supplier who wants to transport multiple ...E-Way Bill under Goods & Service Tax - All You Need to Know.
E-Way Bill under GST An E-way bill is a document required to be carried by a person in charge of the conveyance carrying any consignment of goods of value exceeding fifty thousand rupees as mandated by the Government in terms of Section 68 of the ...Cases When E-Way Bill is Not Required
Cases when an Eway bill is not required The Goods and Services Tax (GST) law was introduced in India to correct the erstwhile law’s several wrongs. One of the main problems was a lack of transparency concerning both the taxpayers and the government. ...How to Generate E Way Bill For Unregistered Person
How to Generate E-Way Bill for Unregistered Person? An E-Way Bill is an online document that is generated via an e-way bill portal for the movement of goods from one place to another. The Government of India implemented an e-way bill to minimize the ...

